 Hello friends!
Today (and for the next 4 months) I am speaking to you from a whole new perspective…. HOLIDAYS!
That’s right folks. I’m free as a bee… (on it’s time off.. from… making honey….)
So, as you do, when you’ve got a good day to burn… I like to crank up that oven, whack on the severely severely dirty apron, and consume so much butter and sugar that’s it’s definitely unhealthy… in a totally good way.
SO what I did a few weeks ago, amidst all that yah-di-yah exam nonsense, I baked a cake that was on my mind.
But not just any old cake…
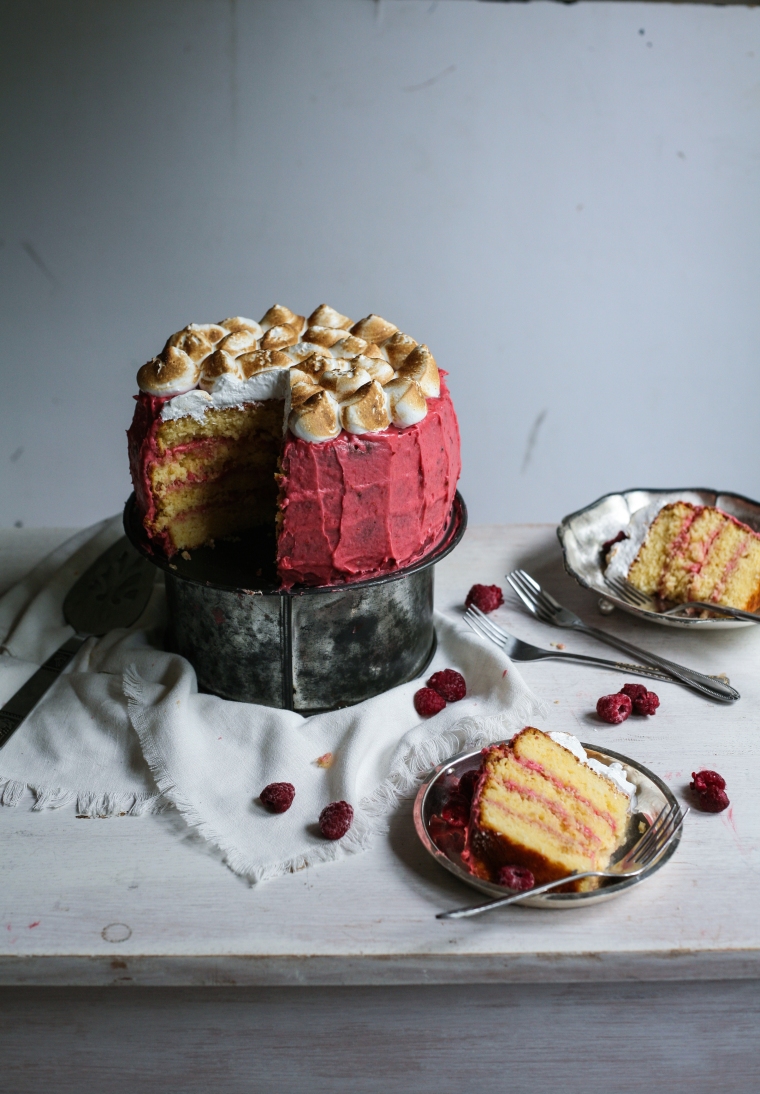
A Coconut Cake with Raspberry Buttercream, where at that moment I didn’t have time for a meringue topping, but it was totally in the works, and not forgotten (don’t you worry your little head meringue… I could never forget about you)
 Thus, in the flurry of exams, an angel was born a.k.a. this cake.
And there was sarisouly no better way to celebrate than with a cake that was my life boat/safety net/floaty/whatever makes exams durable.
And then I decided to ‘holidayize’ it, if I may.
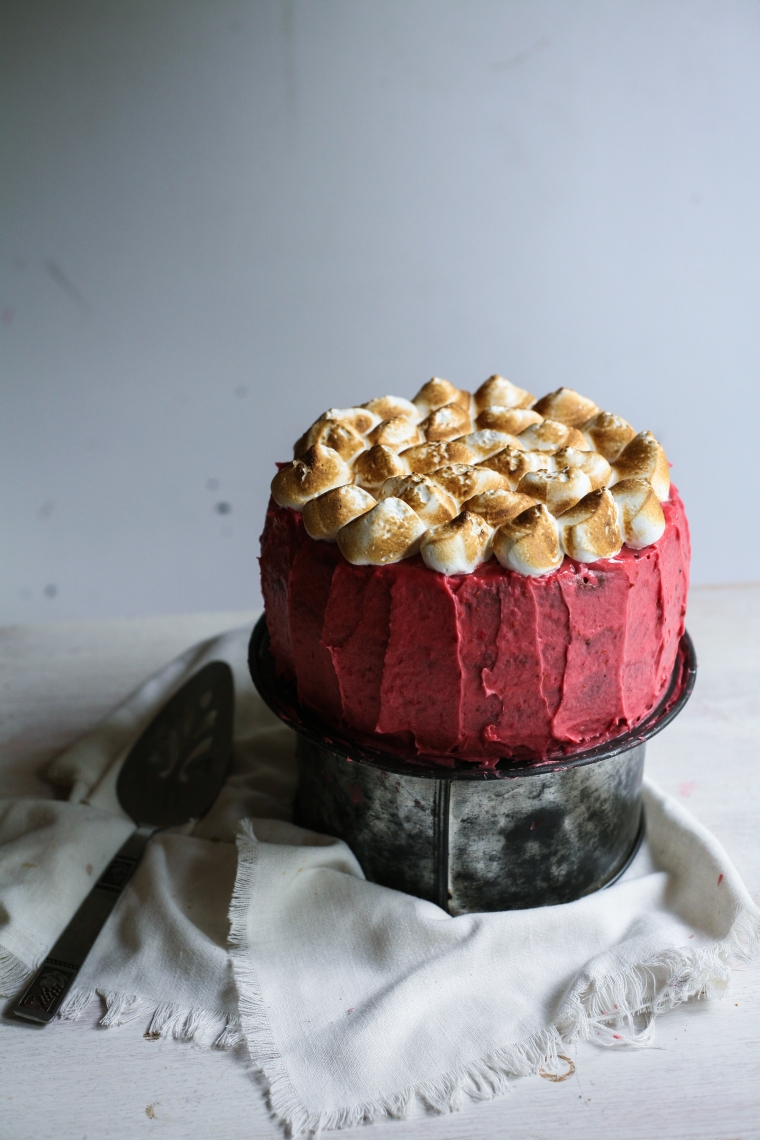
With the casual extra layer of cake, and blow torching the crap out of dat silky meringue.
Yeah man, wot of it.
 And by the way, can we just talk about this Raspberry Buttercream business for a bit?
Cause far out… it is seriously the best thing to happen to buttercream since… well, plain buttercream.
It’s mega colourful, got flecks of that raspberry seed and adds the most delicious raspberry flavour, like only a raspberry could.
I could live of the stuff, I mean I would be the size of a house, but still, I could live on the stuff.
Need I say more?
And you guyzzzz, if I could ever recommend anything, I would 100% put my money on a blowtorch.
They are by far one of the funnest things to bake with…. everrrrrrrr.
You feel like a boss. Just sayin’.
 Another reason this post was labeled Celebratory Cake is because, according to wordpress, Daisy and the Fox has been in action for 2 years! So kinda a birthday cake occasion as well I reckon 🙂
I just wanted to take this opportunity to thank all the beautiful, and encouraging readers of my blog, it really wouldn’t be the same without you here. (i’d just be a crazy woman blabbing to myself and publishing it all on the internet… maybe I still am…). It’s so humbling to know that these pages and photographs are found and read… and I really wish I could give you guys a slice of this cake! This space is a labour of love and a well cherished creative outlet, that I pour over when ever I get the chance, and really couldn’t thank you all enough for being here, and not making me feel so crazy and sharing our love for food.
This community is what keeps blogs going, and you all rock. Everyone of you… even the rocks… (just don’t Bec… it was nice up until now…)
So, I thought, seen as you hear me chin wag on forever, but may not know actually much about me, I thought I’d share it in a little ’15 things you maybe didn’t know about me’
1. I things like soups and hot chocolates to be hot when i have them. Like super hot. It’s kinda wierd really, I even leave the dinner table to heat things up again …. its so wierd (hence my coffee order ‘skinny latte extra hot‘
2. if you saw what I ate you’d think I’m a vegetarian. I’m really not, I love a good lamb backstrap… but yeah, me likely me veggies
3. I cannot open a letter properly to save my life
4. I sing yell too much for my own good… sometimes it’s just cause I know my mum loves my vocals (kiiiddddddinnggg)
5. I secretly wish I was beyonce.
6. I also secretly wish I was a kick ass spy… but now that i’ve told you… i’ll have to kill you…
7. I wanna live in the country side one day, and just chill with ma farm dogs all day
8. I’ll probs become a crazy dog lady… it’s true, I already know the 5 dog breeds i’m gonna have at one time..
9. I think I was meant to be born in the 50’s, so I could be a kid in the 60’s, teen in the 70’s and adult in the 80’s. Now THAT would be RAD. None of this technology business overtaking our lives (ironic coming from a blogger).
10. I hate being overdressed…. like to the point I feel mega uncomfortable. As I say… if in doubt always dress casual. Always.
11. I’m probably the biggest homebody you will ever meet. Legit.
12. I sometimes always speak so fast it actually sounds like “blah blee blah blee blah memenfjensdkgbdfk”, well that is according to my friends…
13. You may notice that I always speak about ‘my sister’, but in real truth, she’s ma identical twinnn
14. I am the worst decision maker everrrrrrrrrr. You do not wanna go to a delicious restaurant with me.. cause you’ll spend 1 hr waiting for me to make a decision.
15. I used to think guilty meant innocent and innocent meant guilty… and I have no idea why… randommmm
Anywayzzzz, shall we jump to the recipe already?
I reckon.
Ready? Steady?
Yummmmmmm
COCONUT CAKE WITH RASPBERRY BUTTERCREAM & TOASTED MERINGUE
Coconut Cake recipe from The Australian Women’s Weekly
Raspberry Buttercream recipe from My Recipes
Meringue Recipe from Bakerella
Ingredients
Cake: (ingredients for one cake, so double the ingredients to make both the cakes)
125g butter, softened
½ teaspoon coconut essence
1 cup caster sugar
2 eggs
½ cup (40g) desiccated coconut
1½ cups self-raising flour
250g extra-light sour cream (or greek yogurt)
1/3 cup (80ml) milk
Raspberry Buttercream:
1 cup butter (230g), softened
1 cup fresh raspberries (I used frozen raspberries, which just need to be left out to defrost a bit)
2 teaspoon vanilla extract
1/4 teaspoon salt
4 cups icing sugar
Meringue:
300 g superfine sugar (1 1/2 cups)
150 g egg whites (from about 5 eggs)
Method
Cake:
1. Preheat oven to 180°C (160°C fan-forced). Grease deep 22cm-round cake pan; line base with baking paper.
2. Beat butter, essence and sugar in a small bowl with an electric mixer until light and fluffy. Beat in eggs, one at a time.
3. Transfer mixture to a large bowl. Stir in half the coconut and half the sifted flour, half the sour cream and half the milk, then add remaining coconut, flour, sour cream and milk; stir until smooth.
4. Spread the mixture into the pan; and continue to make the second cake (repeat the steps above)
5. Bake both the cakes for about 50 minutes or until cooked when tested. Stand cakes in pan for 10 minutes before turning onto wire rack, to cool completely.
Raspberry Buttercream:
1. Beat first 4 ingredients at medium speed with an electric mixer until creamy.
2. Gradually add powdered sugar, beating at low speed until blended and smooth after each addition.
Meringue:
1. Line a rimmed baking sheet with parchment paper, pour in sugar and bake for about 5 minutes at 200C until the edges just begin to melt.
2. Meanwhile, pour egg whites into the bowl of your stand mixer (make sure it’s clean) fitted with the whisk attachment. Whisk on low allowing bubbles to form, increase to high and continue whisking until stiff peaks form and you can turn the bowl upside down without the egg whites falling out.
3. Remove the sugar from the oven and begin whisking again at high speed. Add one big spoonful at a time, ensuring that the whties come back to stiff peaks after each addition. Once all the sugar is added, continue to whisk for 5 – 7 minutes. You should be able to rub the mixture between your fingers and not feel any grit from the sugar. You know it’s ready to use when it forms a smooth shiny peak on the tip of your finger.
The Final Product:
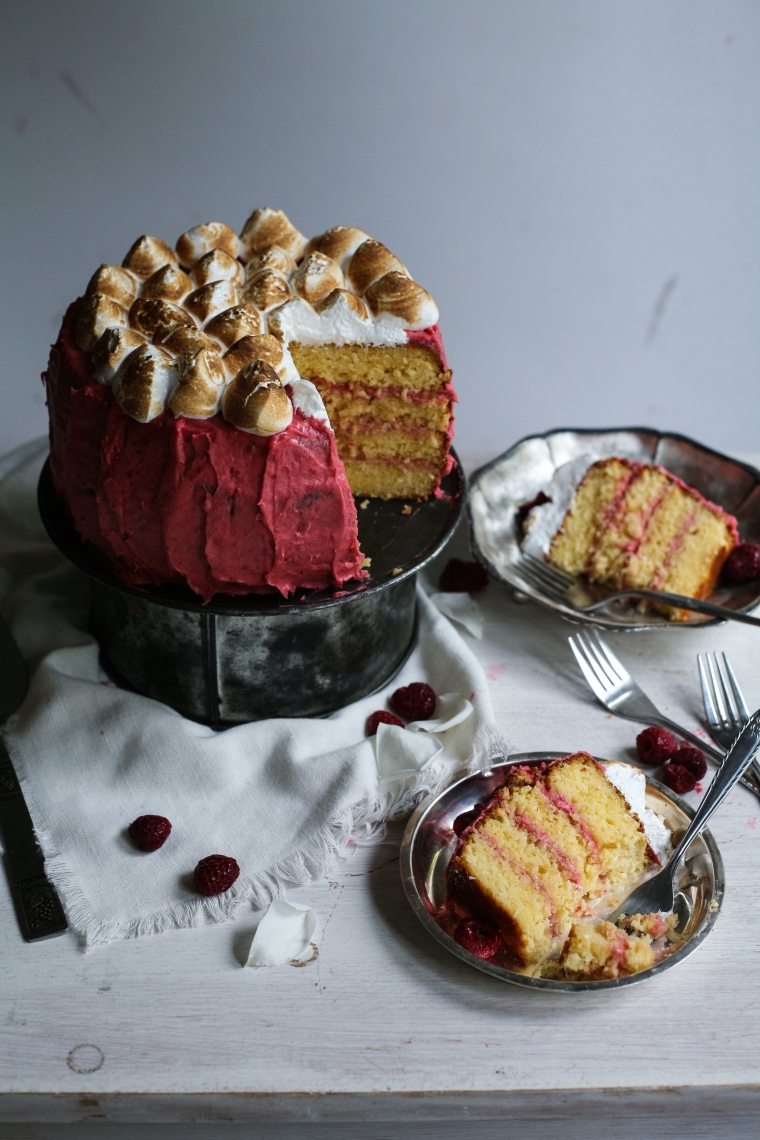
1. Carefully, using a sharp knife, neaten the 2 cakes to flatten the tops, sides & bottoms, making sure they both match up.
2. Evenly cut both the cakes in half, then take a cake and ice the top with the raspberry buttercream, top with another cake layer and repeat with the rest of the cake layers.
3. Evenly spread the rest of the raspberry buttercream over the cake, then fill a piping bag with the meringue mixture and pipe over the top of the cake. (you may have some meringue mixture left over, so you can bake this on a tray in the oven at 200C for around 30-40 minutes or use your torch to bake them for more fun!)
4. Turn on a blowtorch, and using a sweeping motion, ‘toast’ the meringue, being careful to not burn it and melt the buttercream.
5. celebrate, serve and enjoy!
 This cake is coconuty in all the right places, and so utterly scrumptious that it is possible to unashamedly almost clear this whole bad boy in one sitting with family …. I’m not even embarrassed.
If you’ve stuck with me through to the end of the post (boy it was a long one), I really appreciate it… you da best.
Thanks for stopping by!


 Hey hey folks!


